
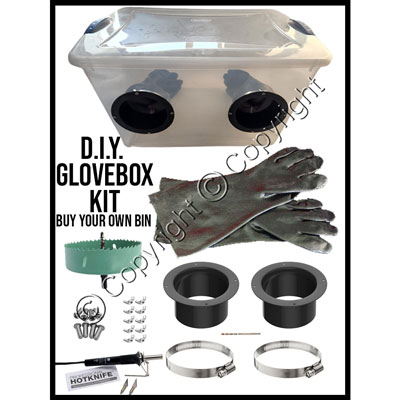
This tutorial provides step-by-step instructions, showing how to build a professional glovebox (also known as a still-air box or SAB) utilizing our DIY Glovebox Kit. Our kit comes with most everything you need to build a glovebox, except for the plastic bin, which you will need to provide yourself. We recommend using a 66 quart (or similarly sized) Sterlite brand bin which is readily available at most big-box or home improvement stores.
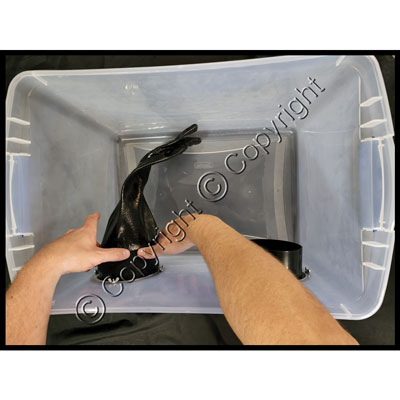
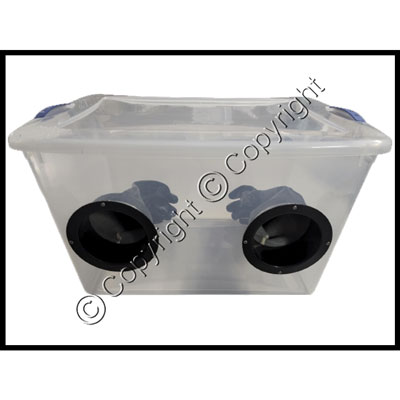
A glovebox is a sealed container that is designed to allow the user to manipulate objects in a sterile and draft-free micro-environment. Gloves are built into the face of the container and arranged so the user can easily place their hands into the gloves and perform procedures inside of the bin without breaking containment. A glovebox is essential for mushroom inoculations, agar work, liquid culture work, or any other laboratory procedure that is sensitive to airborne contaminants.

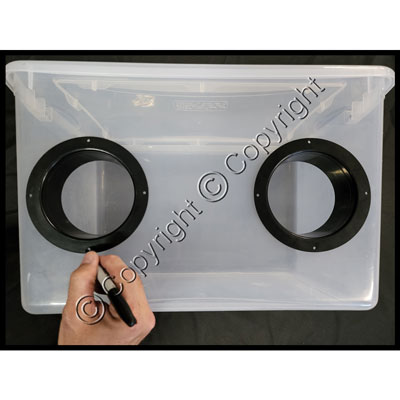
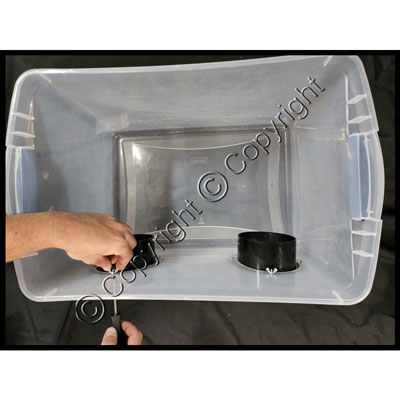
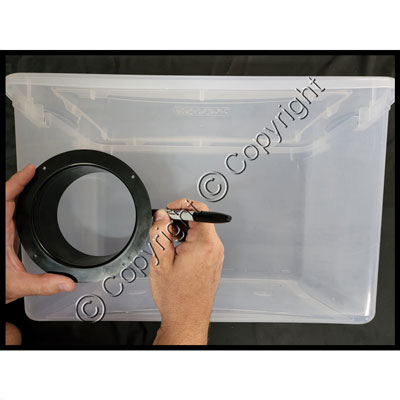
Step 1: Gather all of your supplies. Our DIY Glovebox Kit comes with most everything you need but you will need to supply some items yourself. The kit includes: (2) 5" glove ports, (2) 5" glove clamps, (2) 18" vinyl glove, (8) screws, (8) wing nuts, (1) drill bit, (1) 5-1/8" (130 mm) hole saw (optional) and (1) electric hot knife (optional). In addition to these items, you will need to provide your own clear plastic bin (we recommend a 66 quart sized bin), a powered drill, a black permanent marker, a Phillips-head screwdriver and a flat head screwdriver. If you choose not to purchase the optional hole saw or hot knife, you will also need an old steak knife with a non-serrated blade and a butane/propane powered torch.
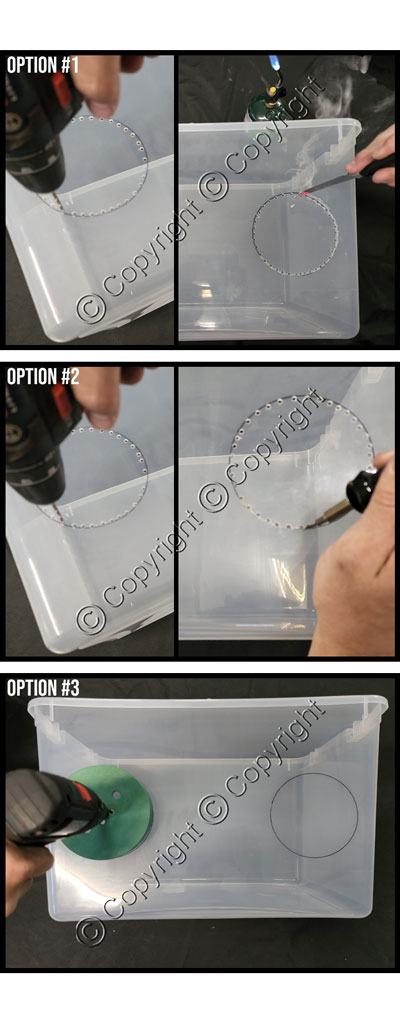
Option #1: This option is the cheapest (and most tedious) method of cutting out your access holes. Attach the included drill bit to your power drill then drill a bunch of tiny holes just inside the outlines of each traced circle, as close together as possible with no more than 1 cm between holes (see photo above). Exercise caution to prevent the bin from flexing during this process, as it could crack. You can use a block of wood on the underside of where you are drilling to help prevent the bin from flexing. Afterwards, you will use a self-provided heated blade to finish the cut. In the photo above, we use an old steak knife for our blade. You can use whatever kind of blade that you have, just be sure it has a straight edge (non-serrated) and it will not transfer heat to the handle when the blade is heated with a flame. After your holes are drilled around your traced circular outlines, use a propane/butane powered torch to heat the end of your knife until it glows red. (Alternatively, you can use a candle or cigarette lighter to heat the blade but you will have to reheat your blade much more often than you would with a gas-powered torch.) Carefully stick the tip of your blade into one of the drill holes and use the heat to cut the plastic until you reach the neighboring drill hole. Continue working the knife from drill hole to neighboring drill hole, around the traced circle. Using the heat of the blade (rather than pressure/force) will minimize the chance of your plastic bin cracking. You will need to reheat your blade multiple times during this process, as the blade will not retain the heat for very long. This process is tedious and takes much longer than using a hole saw. Furthermore, the cut will not be as clean as that of a hole saw. If needed, rough/jagged edges can be smoothed down with a piece of sandpaper. Burning plastic will create smoke and toxic fumes. This method should only be performed outside in the open-air while wearing a proper face mask.
Option #2: This option is a similar concept to Option #1, but instead of using a self-provided knife and gas-powered torch, you will use the optional electric hot knife to make the cuts. Attach the included drill bit to your power drill then drill a bunch of tiny holes just inside the outlines of each traced circle, as close together as possible with no more than 1 cm between holes (see photo above). Exercise caution to prevent the bin from flexing during this process, as it could crack. You can use a block of wood on the underside of where you are drilling to help prevent the bin from flexing. Afterwards, you will use the hot knife to finish the cut. After your holes are drilled around your traced circular outlines, power on your hot knife and let it heat up for at least ten minutes before using. After the knife has heated up, carefully stick the tip of your blade into one of the drill holes and use the heat to cut the plastic until you reach the neighboring drill hole. Continue working the knife from drill hole to neighboring drill hole, around the traced circle. Using the heat of the blade (rather than pressure/force) will minimize the chance of your plastic bin cracking. Using a "sawing" motion while cutting will make it easier. This process is tedious and takes much longer than using a hole saw. Furthermore, the cut will not be as clean as that of a hole saw. Burning plastic will create smoke and toxic fumes. This method should only be performed outside in the open-air while wearing a proper face mask.
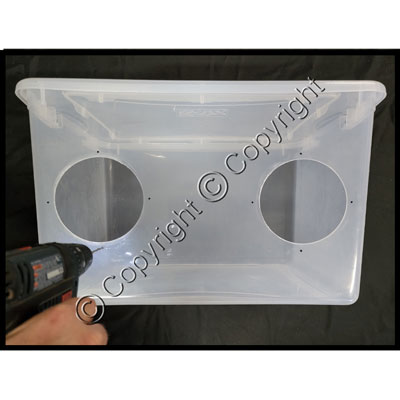
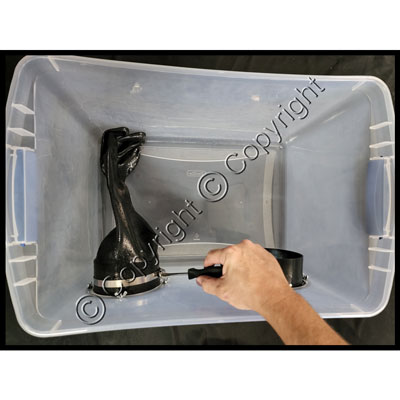
Option #3: This is our recommended method. Assemble your optional 5-1/8" (130 mm) hole saw and attach it to your power drill. Next, drill out your traced circles by placing the bit onto the center-point of each traced circle (see photo above). Slowly power the drill on until the drill bit fully penetrates the bin (saw teeth should not be touching bin but the center bit should be through the bin). At this point, you should make sure the hole saw has maintained a perfect centered position on the traced circles before completing the cut. Next, power the drill on at full speed and complete the cut through the bin. Be cautious not to exert excessive pressure onto the bin while drilling, as it could crack the plastic. Alternatively, you can minimize the chance of your bin cracking by supporting the back of the bin (directly behind your traced circles) with a block of wood which will help prevent the bin from flexing while you are drilling.