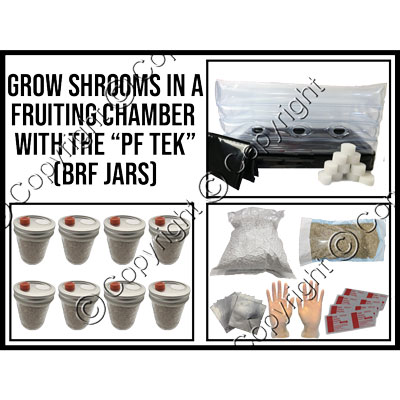
Shroom Supply's
PF Tek kit is the easiest way to get started growing mushrooms! Our mushroom cultivation kit comes with everything you will need to grow mushrooms (except spores). The "PF Tek" is a technique for growing mushrooms on
organic brown rice flour (BRF) and
vermiculite in half-pint sized mason jars developed in 1992 by the late Robert McPherson. The technique was developed to make mushroom cultivation accessible to anyone using easily sourced ingredients and remains an extremely popular mushroom cultivation method to this day.
Our PF Tek style grow kits are a three stage process: 1) Jar Inoculation 2) Birthing the Jars 3) Mushroom Fruiting

1) Jar Inoculation
You should be doing the injection in a
glovebox, or at the very least, a still-air environment. If you are going to work in open air, we suggest turning your AC/heater off an hour prior to inoculating your
brown rice flour jars (this reduces the amount of airborne contaminants in the area). It is also recommended to work in a clean, small room with the door closed to prevent airflow.
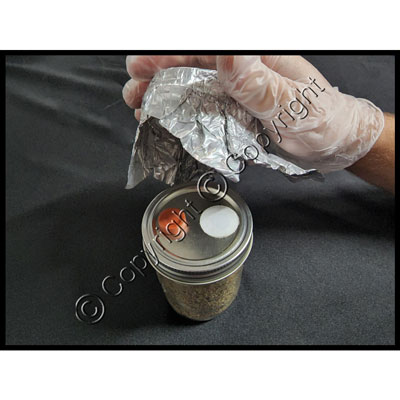 Step 1:
 The first step of inoculating a
brown rice flour jar is to prepare it for injection with spores or mycelial culture. Carefully pull the aluminum foil off the top of the jar. This foil should not be removed until you are ready to inoculate the jar. This foil protects the jar from airborne contaminants landing on it until it is ready to be used.
 Step 2:
 Put on a pair of
gloves and sanitize with
hand sanitizer. Wipe down the orange
self-healing injection port with a
sterile alcohol swab.
 Step 3:
 Flame the needle of your syringe for 15 seconds. After flaming the needle, press the plunger of the syringe down slightly and squirt a small amount of solution out of the needle to cool it down. This step is best performed with the assistance of an
alcohol burner because it will not leave any soot on your needle. If a lighter is used instead, wipe off any lighter soot that is left behind on the needle with a sterile alcohol swab immediately after flame sterilization.
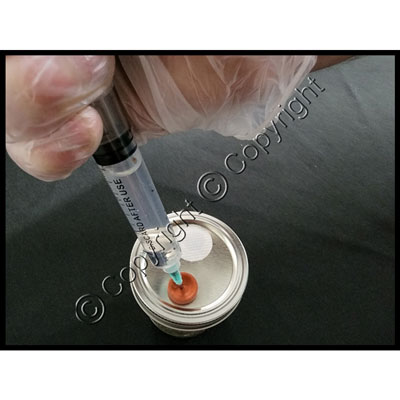 Step 4:
 Carefully inoculate the
brown rice flour jar through the self-healing injection port with 1.5-2 ccs of spore or culture solution.
 Step 5:
 Place your jar in a clean dark area that is subject to minimal disturbances and will maintain a temperature between 75 and 81°F. Inside of a kitchen cupboard works well for this purpose. You should see signs of growth 3-10 days after inoculation. Try your best to disturb the jar as little as possible during this time period.
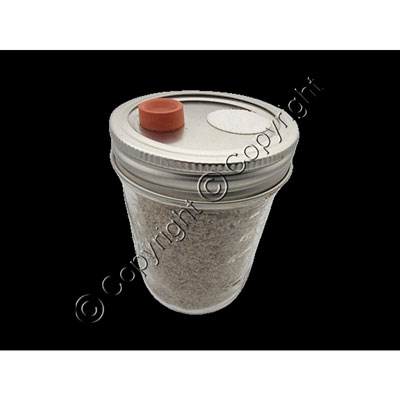
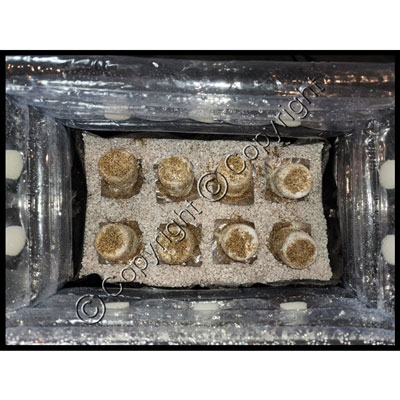
 Step 6:
 After approximately 3-5 weeks, the mycelium will have colonized 100% of the jar. 100% colonization has been reached when the jar has turned completely white with mycelium. Your jar should look similar to the photo above. You are now ready to fruit the jar in a
fruiting chamber.
2) Birthing the Jars
 Step 7:
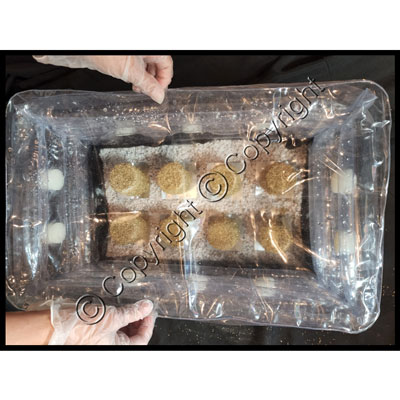
 Prepare your
inflatable fruiting chamber by inflating it, plugging the gas exchange holes with the provided
1" filters, and lining the bottom with the provided
plastic liner. Wipe down the inside of the fruiting chamber, the underside of the lid, and the plastic liner with isopropyl alcohol.
 Step 8:
 Cut open the one-gallon package of included
perlite then pour the perlite onto the top of the plastic liner in the bottom of the fruiting chamber.
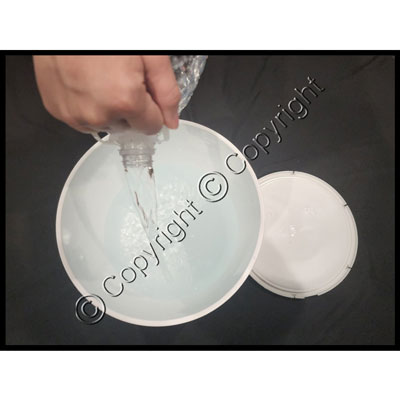
 Step 9:
 Pour 0.5 gallon of distilled or purified water on top of the perlite in the bottom of the
fruiting chamber.
 Step 10:
 Using clean gloved hands, blend the
perlite and water into a homogenous mixture. After thoroughly mixing, level the perlite out in the bottom of the fruiting chamber by spreading and tamping with your hands.
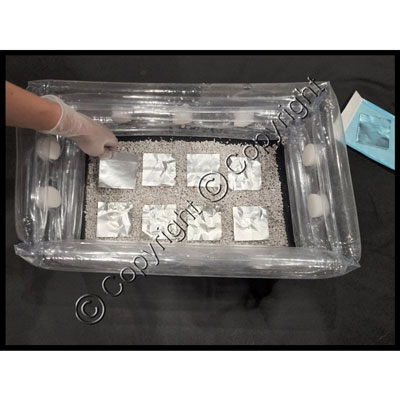 Step 11:
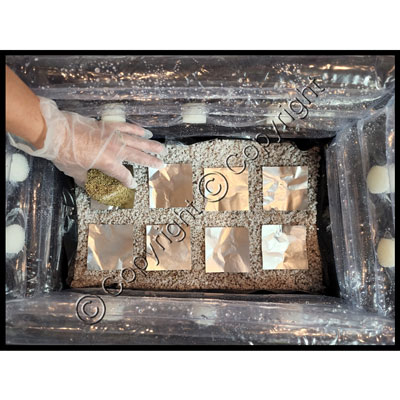
 Open the package of
sterile 3" foil squares (included) and space them evenly in the bottom of your
fruiting chamber.
 Step 12:
 Fill a clean bucket (with lid) with at least two gallons of cold distilled or purified water.
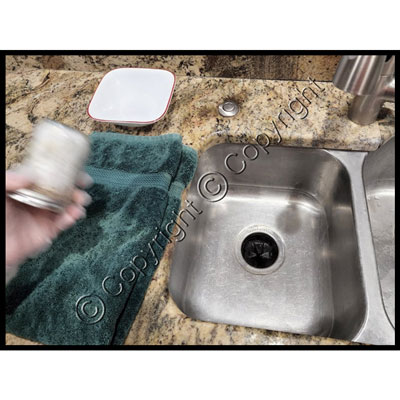 Step 13:
 It is now time to prepare your colonized cakes for fruiting. This step is best performed at a kitchen sink. Make sure to sanitize the sink and surrounding countertop thoroughly before beginning. After the area has been sufficiently cleaned, fold a clean towel over on itself a few times and place it next to your sink. Additionally, a clean bowl or container should be placed next to your sink. Take your first jar and forcibly thud it down on the folded towel a few times. The towel acts as a cushion. This will loosen the cake up and make it easier to remove from the jar.
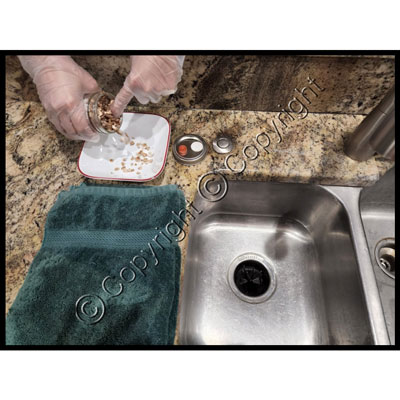 Step 14:
 Unscrew the lid's band from the jar, remove the lid completely, then set it aside. There will be a thin layer of loose vermiculite at the top of the jar. This acts as a barrier against contaminants during the colonization stage. The loose vermiculite should be scraped from the top of the jar and into the bowl with a clean gloved finger.
 Step 15:
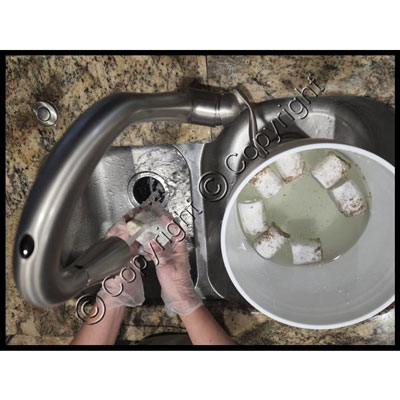
 Work the colonized cake out of the jar by thumping the side of the glass with the palm of your hand. Rinse the colonized cake off under cold running water then place it in the bucket of water. Repeat this process for the remaining seven colonized brown rice flour jars.
 Step 16:
 After all eight cakes have been placed in the bucket of water, use something heavy like a clean porcelain dinner plate to submerge the cakes under the water. Make sure the item you choose is not so heavy that it damages the cakes. Keep this weight on the cakes and seal the bucket's lid. Leave the covered bucket to rest in an air conditioned environment for 24 hours.
 Step 17:
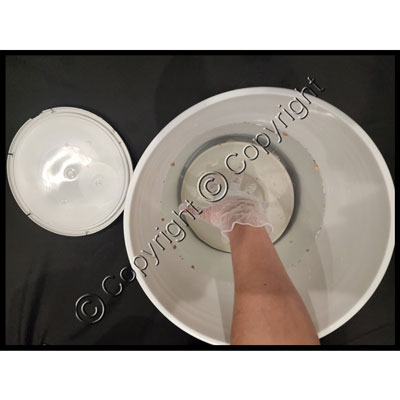
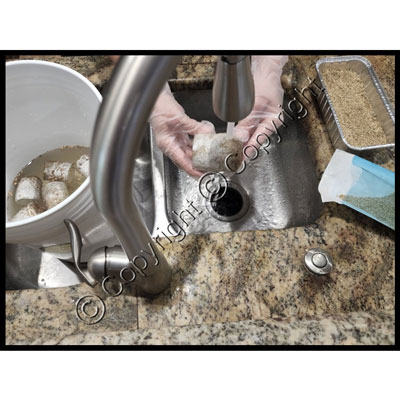
 After your cakes have soaked for 24 hours, it is now time to prepare them for fruiting. This step is best performed at a kitchen sink. Make sure to sanitize the sink and surrounding countertop thoroughly before beginning. A clean bowl or container should be placed next to your sink. Open the sterile pouch of vermiculite (included with your kit) and pour it into your bowl. With a clean gloved hand, procure a cake from the bucket and rinse it off under clean running water, just as you did in the previous
Step 15.
 Step 18:
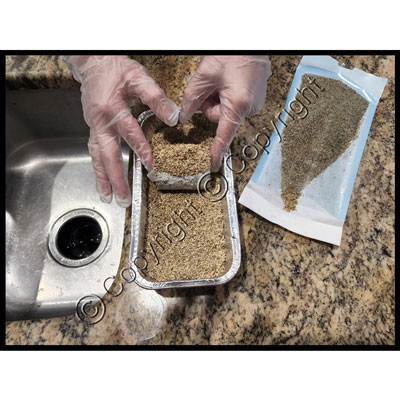
 Immediately after rinsing, roll the wet cake in the bowl of vermiculite, making sure to evenly coat all sides. The vermiculite will naturally stick to the wet cake and will aid in retaining the cake's moisture during the fruiting stage. This procedure is commonly referred to as a "dunk and roll." The 24 hour soak that was previously completed is considered the "dunk" and this step is considered the "roll." A "dunk and roll" adds more hydration to your cakes and locks the moisture in via a thin layer of vermiculite. This creates a microclimate that mushrooms thrive in.
 Step 19:
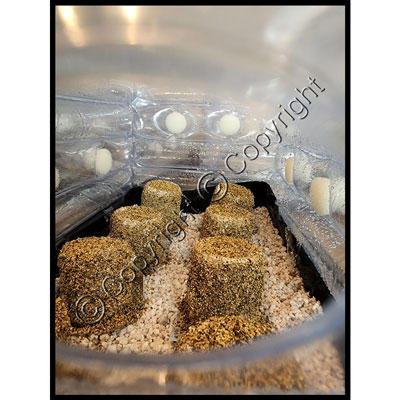
 After the cake is sufficiently coated in vermiculite, carefully place it atop one of the eight
foil squares inside of your
fruiting chamber. Repeat this process for the remaining seven colonized cakes.
3) Mushroom Fruiting
 Step 20:
 It is now time to introduce the
fruiting chamber to fruiting conditions. Introduce the chamber to a scheduled light cycle and keep it in an area that will maintain a temperature between 60 and 80°F (this depends on the species you are growing). We recommend using a
full spectrum fluorescent spiral bulb. The more direct your light source is, the better your mushrooms will grow. The light can be left on for 24 hours a day, or you can put it on a 12/12 cycle, either will work fine.
 Step 21:
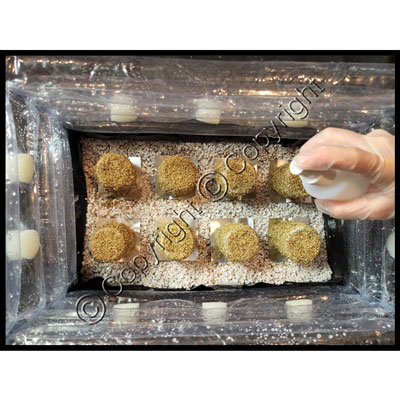
 Once the
fruiting chamber has been introduced to fruiting conditions, generously mist the cakes with a
misting spray bottle that is capable of creating a fine mist, twice per day.
This step is to be repeated on a daily basis, throughout the entire fruiting process.
 Step 22:
 Immediately after misting, fan the colonized cakes for approximately 30 seconds. The easiest way to fan the cakes is by removing the
fruiting chamber's lid, folding it in half, then in half again. Repeatedly move the folded lid back and forth, in a steady motion, to create a fan-like effect. This will promote fresh air exchange and vent out any CO2 that has been produced. Fanning should be performed for approximately 30 seconds, twice per day.
Remember to fan twice per day until the cakes are no longer producing mushrooms.
 Step 23:
 After misting and fanning, put the lid back on your
fruiting chamber.
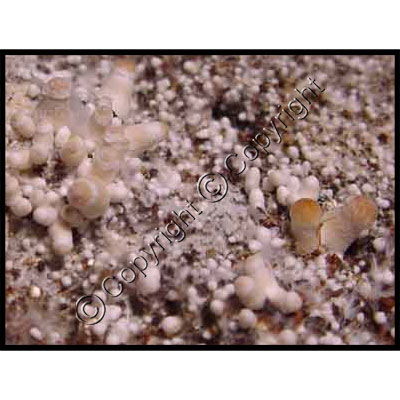 Step 24:
 You will see primordia start to form in approximately 5-10 days. These are miniature pinheads that will eventually turn into mushrooms.
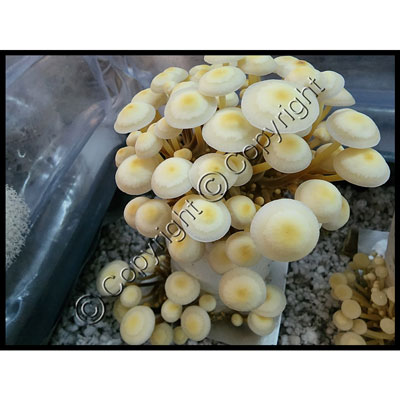 Step 25:
 The primordia in the previous picture will develop into pins within a couple of days. A couple of days later the veils of the mushrooms will start to open up. Once the majority of the mushroom caps have opened up, it's time to pick them! When you pick the mushrooms, grab them from the base and "root" them up with a clean, gloved hand. If pieces of mushroom fruitbodies are left on the cake after harvesting, they can rot and become a vector for contamination.
 Step 26:
 Once you pick all of the mushrooms, your cakes should be free of all pieces of fruitbodies. It should look like the photo above. This is the perfect time to mist/fan and put the lid back on your
fruiting chamber. Put the chamber back on its light schedule and wait for the next flush! Remember to continue to mist and fan the fruiting chamber daily. You should get 4-5 flushes before the cakes are spent (no longer productive) with about 7-10 days between harvests.