You should be doing the injection in a
glovebox, or at the very least, a still-air environment. If you are going to work in open air, we suggest turning your AC/heater off an hour prior to inoculating your bags (this reduces the amount of airborne contaminants in the area). It is also recommended to work in a clean, small room with the door closed to prevent airflow.
 Step 1:
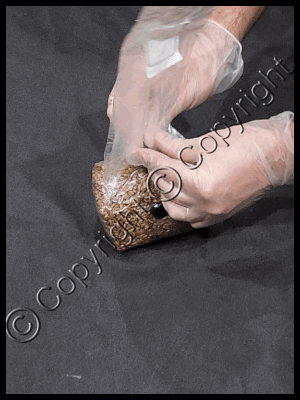
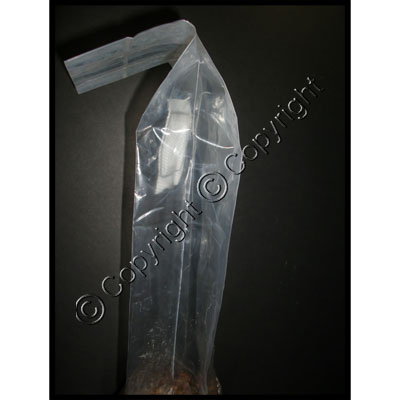
 The first step of inoculating a
grain bag is to prepare it for injection with spores or mycelial culture. Carefully pull the gussets on the bag apart all the way up to the top of the bag, where it is sealed. You want to make sure to "inflate" the bag enough so the filter has some room to "breathe." If the filter is pressed up against the plastic of the bag, it will limit gas exchange during the colonization phase and could potentially stall the colonization process.
 Step 2:
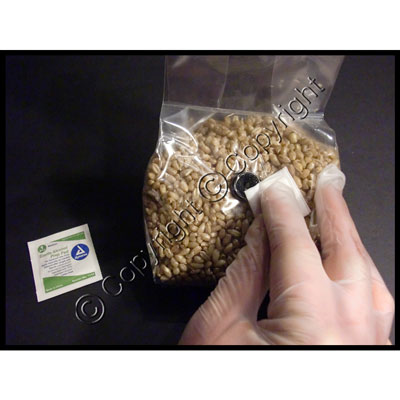
 Put your gloves on if you have not already. Wipe down the black self-healing injection port with a sterile alcohol swab.
 Step 3:
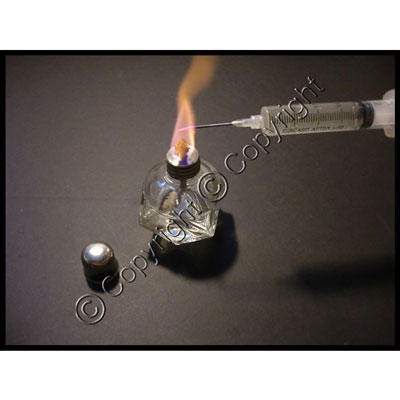
 Flame the needle of your syringe for 15 seconds. After flaming the needle, press the plunger of the syringe down slightly and squirt a small amount of solution out of the needle to cool it down. This step is best performed with the assistance of an
alcohol burner because it will not leave any soot on your needle. If a lighter is used instead, wipe off any lighter soot that is left behind on the needle with a sterile alcohol swab immediately after flame sterilization.
 Step 4:
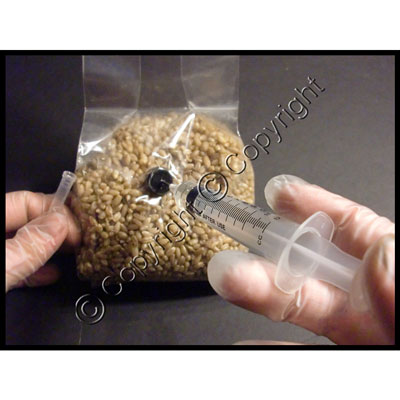
 Carefully inoculate the bag through the self-healing injection port with 1.5-2 ccs of spore or culture solution.
 Step 5:
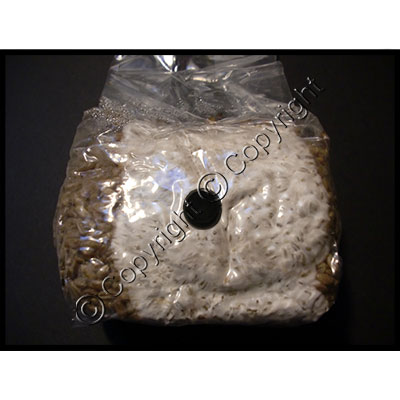
 Place your bag in a place that is subject to minimum disturbances and will maintain a temperature between 75 and 81°F. It doesn't matter if it is dark or light. You should see signs of growth 3-10 days after inoculation. Try your best to disturb the bag as little as possible during this time period.
You want the bag in an upright position (not rolled up) with ample space between the filter and the plastic of the bag so it can breathe during this critical colonization time period. See picture above.
 Step 6:
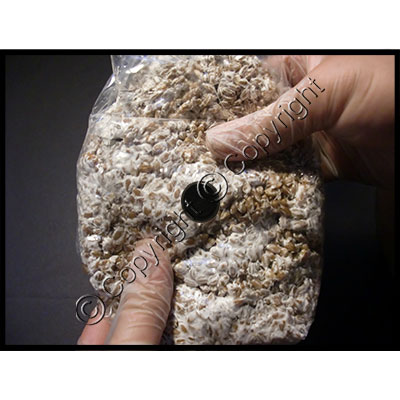
 After approximately 3-4 weeks, the mycelium will have colonized 70-75% of the bag.
 Step 7:
 At this point of colonization (70-75%), break the grain up with your hands through the outside of the bag. This will distribute the mycelium and speed up the last phase of colonization. Do not perform this step until mycelial colonization has reached a minimum of 70%, doing so can stall growth.
 Step 8:
 The mycelium will take several days to recover from getting broken up and should colonize 100% of the bag approximately three to seven days after the prior step (breaking up mycelium) was performed. Once you reach this point, it is now time to spawn the colonized grain to a
bulk substrate.
Next Tutorial (OPTION 1): Pre-Pasteurized Compost Colonization in MycoBags
Next Tutorial (OPTION 2): Pre-Pasteurized Compost Colonization in a Monotub 